Why Peel and Stick Tiles Are Easy to Install
Peel and stick tiles have become a popular choice for modern home updates because they simplify the installation process. Unlike traditional tiles, they do not require grout, mortar, or specialized tools.
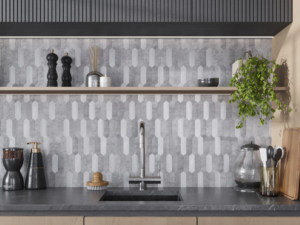
With a pressure-sensitive adhesive backing, these tiles can be installed quickly on suitable surfaces. This makes them ideal for kitchen backsplashes, bathroom accent walls, and small renovation projects.
Even though installation is simple, following the correct steps ensures better adhesion and a cleaner final result.
Step 1: Prepare the Wall Surface
Surface preparation is the most important step in peel and stick tile installation.
The wall should be:
- Clean and free of dust or grease
- Completely dry
- Smooth and even
Suitable surfaces include painted drywall, glass, smooth ceramic tiles, and metal panels. Rough or textured walls may reduce adhesion performance.
Taking time to prepare the surface properly will help prevent tiles from lifting later.
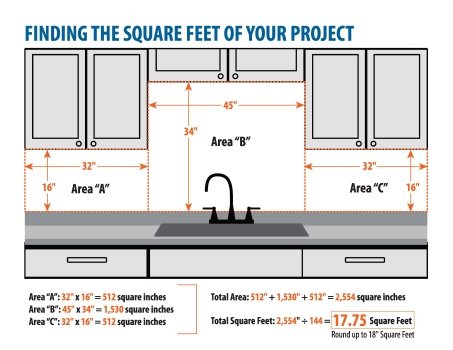
Step 2: Measure and Plan the Layout
Before removing the backing paper, measure the installation area carefully.
Mark a starting line using a level or ruler to ensure the first row of tiles is straight. Planning the layout also helps avoid small tile cuts at the edges.
For backsplash projects, starting from the center of the wall often creates a more balanced appearance.
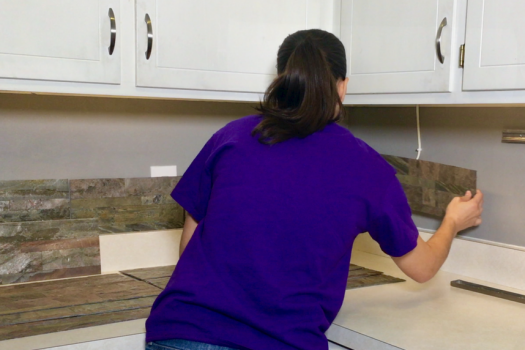
Step 3: Peel and Apply the Tile
Once the layout is ready, remove the protective backing from the tile.
Carefully align the tile with the guideline and press it firmly onto the wall. Apply pressure across the entire surface to activate the adhesive.
Work slowly and check alignment with each tile to maintain consistent spacing and pattern continuity.
Step 4: Trim Tiles for Edges or Corners
For areas near outlets, corners, or cabinets, tiles may need trimming.
A utility knife or heavy-duty scissors can be used to cut most peel and stick tiles. Measure carefully before cutting to ensure a clean fit.
Precise trimming helps maintain a professional finish around edges.
Step 5: Press and Secure the Tiles
After installation, press each tile again using your hand or a soft roller. This step ensures the adhesive bonds evenly to the wall surface.
Applying firm pressure along the edges is particularly important to prevent lifting over time.
Final Thoughts
Learning how to install peel and stick tile is straightforward when the correct preparation and alignment steps are followed.
With proper installation, peel and stick tiles provide a fast and effective way to upgrade walls and backsplashes while maintaining flexibility for future updates.